MapLibre GL JS Offline Tiles: Adding Realism with Terrain Visualization

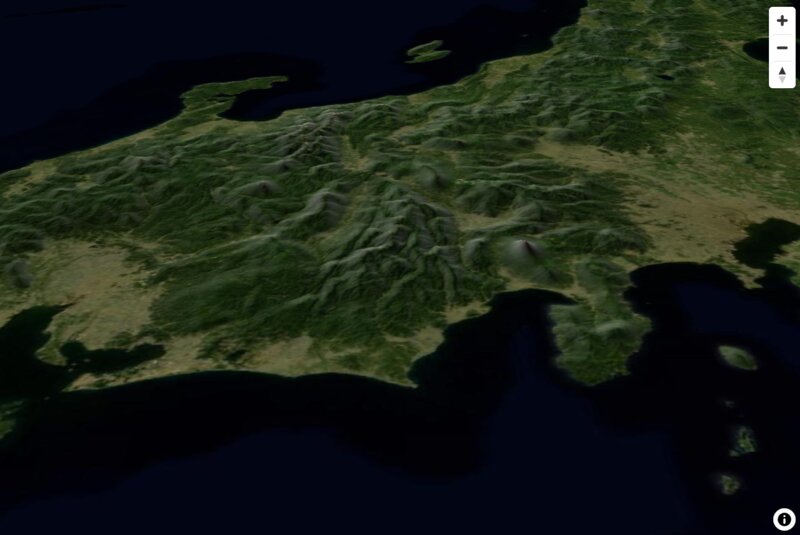
In this article, we'll guide you through building a MapLibre GL JS application using offline tiles, and adding terrain to make the visualization more dynamic and engaging. By incorporating terrain data, you can create maps that show realistic elevation, hillshading, and geographic variations, making the final result not only informative but also visually appealing. Offline tiles are particularly useful for situations with limited or no internet connectivity, and we're starting from scratch to show you each step. Using Vite with TypeScript as our baseline ensures a modern, fast, and optimized development experience.
Setup
First, let's set up a new Vite project with TypeScript.
npm create vite@latest maplibre-offline-tiles -- --template vanilla-ts
cd maplibre-offline-tiles
npm install
Installing MapLibre GL JS
Next, we need to install MapLibre GL JS and its TypeScript types.
npm install maplibre-gl
Unlike CesiumJS, MapLibre GL JS doesn't require special configuration with Vite. We just need to import the CSS file in our main TypeScript file.
Configuring MapLibre GL JS
Unlike CesiumJS, MapLibre GL JS doesn't require special configuration with Vite. We just need to import the CSS file in our main TypeScript file.
Create the tiles server
We will use the pmtiles format to serve the tiles. pmtiles is a simple, fast, and efficient format for storing tiled map data. In order to serve it we are going to acces directly the pmtiles file from the application as an static asset, this approach can also be used by deploying the file to an S3 compatible file storage.
We are going to use the serve npm package:
npm install --global serve
Now we can use the pmtiles provided by Keimaps as an starting point. They can be obtained here:
We copy the pmtiles files to the server folder.
cp ./dem.pmtiles ./satellite.pmtiles ./server
Then we just run it where we have save our pmtiles file. We allow CORS to * by using the -C parameter. By default it will serve on port 3000.
serve -C
Consuming the pmtile file
Now that we have out pmtiles avaiable we can use it with MapLibre GL JS. To use pmtiles with MapLibre GL JS, we need to install the pmtiles library:
npm install pmtiles
Example Code
Let's update our main.ts file to initialize MapLibre GL JS with the offline tiles. In the following code, we:
Import Libraries: We import maplibre-gl for the map rendering and the pmtiles library to handle offline tiles. We also import the MapLibre GL CSS.
-
Register PMTiles Protocol: We register a custom protocol to handle PMTiles data using the addProtocol function. This allows MapLibre to understand the pmtiles:// URLs.
-
Set Up Map Configuration: We create a new map instance using maplibregl.Map(). This configuration specifies:
-
The container in which the map will be rendered (container: 'map').
-
The map style, including sources for offline tiles, terrain, and hillshade data. The hillshade data is used to create a realistic 3D effect and although is a separate layer, it uses the same source for the elevation data.
-
Adding layers for raster tiles, hillshading, and terrain elevation to make the map look realistic.
-
-
Local Tile Server: The map uses tile sources from the local server (http://localhost:3000). This setup ensures that the map can work offline as it relies on locally hosted tiles.
-
Adding Navigation Controls: We add basic navigation controls, such as zoom in and out, to the map.
import maplibregl from 'maplibre-gl';
import 'maplibre-gl/dist/maplibre-gl.css';
import { Protocol } from 'pmtiles';

// Register the pmtiles protocol
const protocol = new Protocol();
maplibregl.addProtocol("pmtiles", protocol.tile);

// Initialize the MapLibre GL JS map
const map = new maplibregl.Map({
  container: 'map',
  style: {
    version: 8,
    sources: {
      'offline-tiles': {
        type: 'raster',
        url: 'pmtiles://http://localhost:3000/satellite.pmtiles',
        attribution: '©KeiMaps',
        tileSize: 256,
        maxzoom: 8,
      },
      terrainSource: {
        type: 'raster-dem',
        url: 'pmtiles://http://localhost:3000/dem.pmtiles',
        attribution: 'NASA',
        tileSize: 256,
        maxzoom: 5,
    },
    hillshadeSource: {
      type: 'raster-dem',
      url: 'pmtiles://http://localhost:3000/dem.pmtiles',
      attribution: 'NASA',
      tileSize: 256,
      maxzoom: 5,
  }
    },
    layers: [
      {
        id: 'offline-layer',
        type: 'raster',
        source: 'offline-tiles',
      },
      {
        id: 'hills',
        type: 'hillshade',
        source: 'hillshadeSource',
        layout: {visibility: 'visible'},
        paint: {'hillshade-shadow-color': '#333'}
    }
    ],
    terrain: {
      source: 'terrainSource',
      exaggeration: 2
  },
  },
  center: [0, 0],
  zoom: 2,
});

// Add navigation controls
map.addControl(new maplibregl.NavigationControl());
Update the index.html file to include a container for the MapLibre GL JS map.
<!DOCTYPE html>
<html lang="en">
  <head>
    <meta charset="UTF-8" />
    <meta name="viewport" content="width=device-width, initial-scale=1.0" />
    <title>MapLibre GL JS Offline Tiles</title>
    <style>
      body { margin: 0; padding: 0; }
      #map { position: absolute; top: 0; bottom: 0; width: 100%; }
    </style>
  </head>
  <body>
    <div id="map"></div>
    <script type="module" src="/src/main.ts"></script>
  </body>
</html>
This setup will create a MapLibre GL JS map using offline tiles stored in a PMTiles file. Make sure to replace 'http://localhost:3000/satellite.pmtiles' with the actual path to your PMTiles file.
Remember to serve your PMTiles file from a local server or adjust the URL accordingly if you're hosting it elsewhere.
Wrapping Up
Congratulations! 🎉 You've successfully set up a MapLibre GL JS map using offline tiles from a local server, and even added terrain features like hillshading and elevation. Adding terrain to your map is not only straightforward but also a fantastic way to make your visualization more engaging and informative. Terrain data brings your map to life, adding depth and a realistic sense of geography that flat maps just can't match. Feel free to play around with the terrain exaggeration settings or try out new features to take your map to the next level!
